Products Map

Page of 13

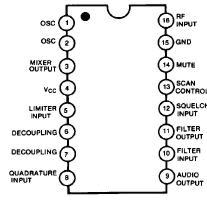
AN8028 Integrated Circuit (IC)

AN8028

IC Switchmode Control 9SIL

£3.65

(inc VAT £4.38)
Quantity

AN8029 Integrated Circuit (IC)

AN8029

IC AC-DC Switch Control 9SIL by Panasonic

£4.00

(inc VAT £4.80)
Quantity

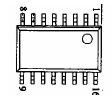
AN8053 Integrated Circuit (IC)

AN8053
IC Panasonic 16DIL

£2.50

(inc VAT £3.00)
Quantity

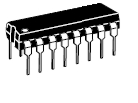
AN8250N Integrated Circuit (IC)

AN8250N
IC Stepper Motor Driver 16DIL

£4.00

(inc VAT £4.80)
Quantity

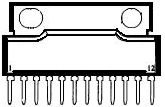
AN8275N Integrated Circuit (IC)

AN8275N
IC Panasonic 12SIL

£2.00

(inc VAT £2.40)
Quantity

AN8377N Integrated Circuit (IC)

AN8377N

IC Three Line Drivers 16DIL + Heat-tab

£2.50

(inc VAT £3.00)
Quantity

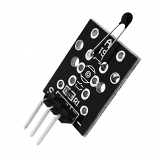
Analog temperature sensor module for Arduino KY-013

KY013

Analogue temperature module for Arduino and other microcontroller projects

Based on an NTC thermistor that lowers its resistance by temperature change.


Temperature range : -55C to 125C

Voltage : 5VDC

Size 19x15mm

£2.50

(inc VAT £3.00)
Quantity

Angled BNC Plug with Screw & Clamp Fitting

BCE

Right Angled BNC Plug Solderless (Screw & Crimp), or can be soldered. Flexible Cable Inlet. For use with RG58, RG59 etc cables. Gold p[lated pin

£1.50

(inc VAT £1.80)
Quantity

Anti-static Pink Bags with Grip-Seal 90 x 130mm. Pack of 100

BAG34AS

Strong - Grip-Seal - Reasable - Reusable - Pink - Antistatic Polyethylene Bags. 90mm x 130mm Pack of 100

Keeps components and sensitive articles safe from anti-static discharge
Useful for component storage and transport.
Reusable Firm Grip Seal Function to secure the contents.
Many uses: example - small parts, jewellery, model-making and general workshop needs.
 

£5.00

(inc VAT £6.00)
Quantity

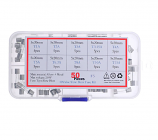
Anti-surge 20mm Fuse Kit 50 Fuses. 5 each of 10 Values

FKT50

Fuse Kit of 50 Anti-Surge Time Delay 20mm Glass Fuses

5 each of 10 Different Values, 10 of each of  1A, 2A, 3A, 3.15A, 4A, 5A, 6.3A, 8A, 10A, 15A

£9.50

(inc VAT £11.40)
Quantity

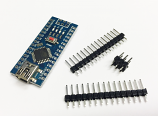
Arduino Nano Revision 3 Development Board

AUN3

Arduino compatible board with the ATMEGA328P microcontroller

The Arduino Nano is a small, breadboard-friendly version of the Arduino UNO.

It has the same functionality as the Arduino Duemilanove but at a much smaller size.

The Arduino Nano is well suited for rapid prototyping and as a great general-purpose microcontroller. 

Since Arduino is open source hardware & software, anyone can copy the Arduino Nano boards exactly, even using original parts.

We are therefore able to supply this Arduino identical compatible board at a fraction of the cost of the original.

Key Features

Variable Input Voltage (7-12V)

Indicator LEDs for immediate feedback

Compact Form Factor (45mm x 19mm)

14 Digital I/O pins

8 Analog I/O pins

16 MHz clock speed

32kb flash memory (of which 2kb is used by the bootloader)


Software can be downloaded from the Arduino website here

https://www.arduino.cc/en/Main/Software

Arduino Quick Start Guide


Installing the Arduino IDE

  1. Go to arduino.cc/en/software and download the appropriate version for your system.
  2. Run the installation file (usually called arduino-1.xx.xx-windows.exe).
  3. Follow the on-screen instructions to complete the installation process.
     

Connecting the Arduino to a computer

  1. Connect the Arduino to your computer using a USB cable.
  2. Open the Arduino IDE and click on “Tools”. When prompted by windows firewall click allow.
  3. Move the cursor over “Board” and select your Arduino board from the list (e.g. “Arduino Nano”).
  4. Click on “Tools” again and move the cursor over “Port”. Now, select the USB port where the Arduino is plugged in. If you have multiple devices under “Ports” and you are unsure which one is the Arduino, try selecting one of the ports and then click on “Tools” and select “Get board info”. If the Arduino port is selected, a small window displaying the board information will appear, otherwise keep trying different ports until the window appears.
  5. To check if the Arduino is connected correctly, click on the “Upload” button at the top of the screen (button with arrow pointing to the right) and wait for the empty sketch to upload. If no errors come up, you’re all set up and ready to go!
     

Installing Arduino Libraries

Method 1

  1. Open the Arduino IDE and click on “Tools” at the top of the screen.
  2. Click on “Manage Libraries”.
  3. Type in the name of the library you wish to install (e.g. “CCS811”) and press enter.
  4. The Library Manager will now display a number of relevant libraries. Hover the cursor over the required library and click “Install”. When the installation has finished, close the Library Manager window.


Method 2

  1. Download the library you wish to install.
  2. Extract the folder from the zip file and paste it in the following location:

         Windows XP and above: C:\Users\%username%\Documents\Arduino\Libraries

         Mac: /Users/<username>/Documents/Arduino/libraries/

         Linux: /usr/share/arduino/libraries/ (you must delete the dashes in the folder name, if there are any)

  1. Restart the Arduino IDE.

£8.75

(inc VAT £10.50)
Quantity

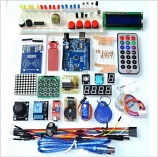
Arduino Uno R3 Starter Kit with RFID

AUR3K

UNO R3 Arduino-compatible starter kit complete with an Arduino Uno board with essential accessories, plus a multitude of parts and modules to start building interesting projects

The Arduino is a great bit of kit for anyone interested in electronics.

This kit comes with everything you need to get started with an Arduino (apart from a PC to program it).

This is the newer RFID version of the kit, containing more useful sensors and parts to make your introduction to Arduino a better experience. 

 
Supplied with the kit:
Arduino UNO R3 
USB A to B 200mm 
830 Tie Points Breadboard
10x 200mm Male to Female Jumper Cables
32x  Male to Male Jumper Cables
2 x 36 Pin Male Single in Line header
1602 16 character 2 Row backlit LCD Display 
I2C SPI Serial Interface Board (LCD Piggyback) 
DS1302 Real Time Clock Module
RC522 RFID Kit
7 Segment Single Digit LED Display
7 Segment Four Digit LED Display
8 x 8 LED Dot Matrix
74HC595 8 Bit Shift Register
Water Level Sensor
ULN2003 Four Phase Stepper Motor Driver
28BYJ-48 5V Four Phase Stepper Motor 
KY019 5V Relay Module
KY015 Temperature and Humidity Module
KY016 RGB LED Module
KY037 Sound Sensor 
KY023 Dual Axis Joystick Module
PP3 Battery Snap with 2.1mm x 5.5mm plug
Infrared Remote Control
Infrared Transmitter/Receiver
4x4 16 Button Matrix
SG90 Servo Motor
2 x SW-520 Tilt Sensor
Active Piezo Buzzer
Passive Piezo Buzzer
10 x Blue LED
10 x Red LED
10 x Yellow LED 
3 x Light Dependent Resistor
Flame Sensor/ Infrared Receiver
LM35 Temperature Sensor
10KΩ Linear Potentiometer (Variable Resistor)
10 x 220Ω Resistors
10 x 1KΩ Resistors
10 x 10kΩ Resistors
10 x 330R Resistors
4 x 10mm Tactile Switches
4 x Tactile Switch Caps
Infrared Receiver
Resistor Colour Code Chart
CD with projects
Carry Case
 
The Arduino IDE Software can be downloaded from the Arduino website here
 
You can download a copy of the included CD here

Arduino CD


Arduino Quick Start Guide


Installing the Arduino IDE

  1. Go to arduino.cc/en/software and download the appropriate version for your system.
  2. Run the installation file (usually called arduino-1.xx.xx-windows.exe).
  3. Follow the on-screen instructions to complete the installation process.
     

Connecting the Arduino to a computer

  1. Connect the Arduino to your computer using the USB cable provided.
  2. Open the Arduino IDE and click on “Tools”. When prompted by windows firewall click allow.
  3. Move the cursor over “Board” and select your Arduino board from the list (e.g. “Arduino Uno”).
  4. Click on “Tools” again and move the cursor over “Port”. Now, select the USB port where the Arduino is plugged in. If you have multiple devices under “Ports” and you are unsure which one is the Arduino, try selecting one of the ports and then click on “Tools” and select “Get board info”. If the Arduino port is selected, a small window displaying the board information will appear, otherwise keep trying different ports until the window appears.
  5. To check if the Arduino is connected correctly, click on the “Upload” button at the top of the screen (button with arrow pointing to the right) and wait for the empty sketch to upload. If no errors come up, you’re all set up and ready to go!
     

Installing Arduino Libraries

Method 1

  1. Open the Arduino IDE and click on “Tools” at the top of the screen.
  2. Click on “Manage Libraries”.
  3. Type in the name of the library you wish to install (e.g. “CCS811”) and press enter.
  4. The Library Manager will now display a number of relevant libraries. Hover the cursor over the required library and click “Install”. When the installation has finished, close the Library Manager window.


Method 2

  1. Download the library you wish to install.
  2. Extract the folder from the zip file and paste it in the following location:

         Windows XP and above: C:\Users\%username%\Documents\Arduino\Libraries

         Mac: /Users/<username>/Documents/Arduino/libraries/

         Linux: /usr/share/arduino/libraries/ (you must delete the dashes in the folder name, if there are any)

  1. Restart the Arduino IDE.

£40.00

(inc VAT £48.00)
Quantity

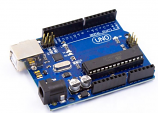
Arduino Uno Revision 3 Development Board

AUR3

UNO R3 Arduino-compatible board with the ATMega328P, ATMega16U2 and CH340G serial converter

Since Arduino is an "Open Source" hardware as well as software; anyone can duplicate the Arduino Uno R3 boards exactly, even using original parts, this means we are able to supply this Arduino compatible board at a fraction of the cost of the original but still working identicaly to the original.

The UNO is the best board to get started with electronics and coding. If this is your first experience tinkering with the platform, the UNO is the most robust board you can start playing with. The UNO is the most used and documented board of the whole Arduino family.

Arduino Uno is a microcontroller board based on the ATmega328P. It has 14 digital input/output pins (of which 6 can be used as PWM outputs), 6 analog inputs, a 16 MHz quartz crystal, a USB connection, a power jack, an ICSP header and a reset button. The development board has everything needed to support the microcontroller to help you create an endless amount of projects and if you are just starting then the worldwide Arduino community is full of ideas, guides and help to get you started or help you complete your project. 
 
Supplied 
1 x Arduino Compatible Uno R3 development board
1 x USB Cable
 

Arduino Quick Start Guide


Installing the Arduino IDE

  1. Go to arduino.cc/en/software and download the appropriate version for your system.
  2. Run the installation file (usually called arduino-1.xx.xx-windows.exe).
  3. Follow the on-screen instructions to complete the installation process.
     

Connecting the Arduino to a computer

  1. Connect the Arduino to your computer using the USB cable provided.
  2. Open the Arduino IDE and click on “Tools”. When prompted by windows firewall click allow.
  3. Move the cursor over “Board” and select your Arduino board from the list (e.g. “Arduino Uno”).
  4. Click on “Tools” again and move the cursor over “Port”. Now, select the USB port where the Arduino is plugged in. If you have multiple devices under “Ports” and you are unsure which one is the Arduino, try selecting one of the ports and then click on “Tools” and select “Get board info”. If the Arduino port is selected, a small window displaying the board information will appear, otherwise keep trying different ports until the window appears.
  5. To check if the Arduino is connected correctly, click on the “Upload” button at the top of the screen (button with arrow pointing to the right) and wait for the empty sketch to upload. If no errors come up, you’re all set up and ready to go!
     

Installing Arduino Libraries

Method 1

  1. Open the Arduino IDE and click on “Tools” at the top of the screen.
  2. Click on “Manage Libraries”.
  3. Type in the name of the library you wish to install (e.g. “CCS811”) and press enter.
  4. The Library Manager will now display a number of relevant libraries. Hover the cursor over the required library and click “Install”. When the installation has finished, close the Library Manager window.


Method 2

  1. Download the library you wish to install.
  2. Extract the folder from the zip file and paste it in the following location:

         Windows XP and above: C:\Users\%username%\Documents\Arduino\Libraries

         Mac: /Users/<username>/Documents/Arduino/libraries/

         Linux: /usr/share/arduino/libraries/ (you must delete the dashes in the folder name, if there are any)

  1. Restart the Arduino IDE.

£14.00

(inc VAT £16.80)
Quantity

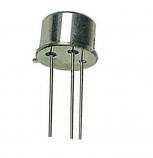
ASY26 Transistor

ASY26

PNP TO5 Germanium 15V 200mA 4MHz

£4.00

(inc VAT £4.80)
Quantity

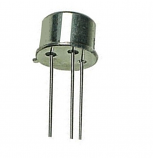
ASY27 Transistor

ASY27

PNP TO5 Germanium 15V 200mA DISCONTINUED - Please go to equivalent 2N1306

ASY76 Transistor

ASY76

PNP TO5 Germanium 32V 500mA 1MHz

£4.00

(inc VAT £4.80)
Quantity

ASY77 Transistor

ASY77
PNP TO5 Germanium 60V 500mA 1MHz

£6.00

(inc VAT £7.20)
Quantity

ASY80 Transistor

ASY80

PNP TO5 Germanium 40V 500mA 1MHz

£4.00

(inc VAT £4.80)
Quantity

ASZ15 Transistor

ASZ15

PNP TO3 Germanium 100V 8A 30W

£9.00

(inc VAT £10.80)
Quantity

ASZ16 Transistor

ASZ16

PNP TO3 Germanium 60V 8A 30W

£9.00

(inc VAT £10.80)
Quantity

ASZ17 Transistor

ASZ17

PNP TO3 Germanium 60V 8A 30W

£6.00

(inc VAT £7.20)
Quantity

ATmega328P IC Microprocessor 28 Pin DIL Integrated Circuit (IC)

ATmega328P

ATmega328P IC Microprocessor 28 Pin DIL

£7.50

(inc VAT £9.00)
Quantity

AU110 Transistor

AU110

PNP TO3 Germanium 160V 10A 30W

£15.00

(inc VAT £18.00)
Quantity

AU113 Transistor

AU1113

PNP TO3 Germanium 120V 10A 30W. Please go to Equivalent AU110

Audio Spectrum Analyzer Kit

CKASA

 VU Audio Level Display Kit

Simple USB-powered audio spectrum analyzer using STC15W408AS microcontroller.  Sensitivity is adjusted using the trimpot RP1 and various modes can be selected using the tactile switch SW1.

Technical Specifications:

Supply Voltage: 5VDC (USB)
PCB Dimensions: 123mm x 63mm


£16.50

(inc VAT £19.80)
Quantity

AUY10 Transistor

AUY10
PNP TO3 Germanium 60V 700mA 5W 65MHz

£7.00

(inc VAT £8.40)
Quantity

AV Link Wireles Bluetooth Headphones Black

PBH10BLK

Wireless Bluetooth® Headphones in Black

 
These incredible rechargeable wireless headphones are great for listening to your music while out and about. Up to 8 hours playback from one charge.
 
Built-in microphone for hands free calls, FM radio and SD card slot
Folds away for compact storage  - you can relax into your music, and when you are done, fold them away and store in the carry case.
  • Wireless Bluetooth connectivity
  • Noise cancelling, perfect for cutting out low noises from planes or trains
  • Dynamic bass technologyInternal rechargeable battery with up to 8 hours playback

£17.50

(inc VAT £21.00)
Quantity

av:link 3 Way Stereo Input Extender Switcher with Phono Sockets (RCA)

INEX

av:link 3 way Stereo Input Extender

A useful little device, enabling connection of up to three extra stereo inputs to your hifi etc.
They are selected by front-panel push buttons.
Ideal for multiple sound sources such as tablets (inc iPads), Moblie Phones, DVDs, Record players, CD players, Cassettes, Tuners, mp3 etc.

Connections via nickel plated RCA phono sockets. No battery needed.

For 3.5mm jack plug to phono converter leads, please see our selection.

Channel separation 60dB @ 1kHz Crosstalk 70dB @ 1kHz


Input: 3 x 2 stereo RCA Phono


Output: 1 x 2 stereo RCA Phono


Dimensions: 45 x 134 x 86mm

£14.50

(inc VAT £17.40)
Quantity

av:link Karaoke Mixer Kit with 2 Microphones

KMIX

av:link Karaoke Mixer Kit with 2 Microphones

A compact, stylish unit that converts your CD/DVD player into a karaoke system to make that party go with a swing.


  • Includes 2 x dynamic microphones
  • Echo control
  • Tone control (treble)
  • Volume control for each microphone
  • RCA phono Inputs/Outputs for audio and video connection
  • Dual microphone inputs (6.3mm)
  • Supplied with 2 x 3.0m mic. leads and 1.5m RCA phono leads
  • Mains adaptor supplied

Specification

Power supply 12Vdc, 500mA (included)

Microphone lead length (each) 1.65m

Dimensions 50 x 133 x 74mm


£25.00

(inc VAT £30.00)
Quantity
Page of 13